
Adding a Table Editor
Editors are subwindows that contain configuration interfaces for one or more of the ECU's tunable tables.
| 1. | In the menu bar, select Layout > Add Control > Add Characteristic > Add Editor. The below window will appear. |
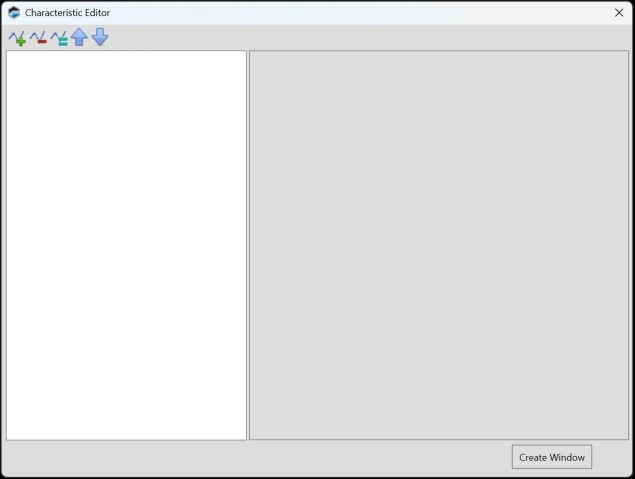
| 2. | Click |
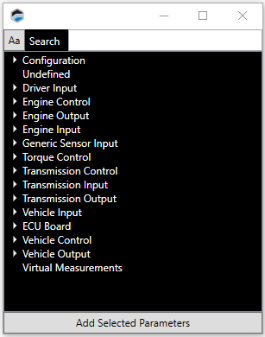
| 3. | Double-click on the table you wish to add. The right column will now show three or four different groups of parameters. |
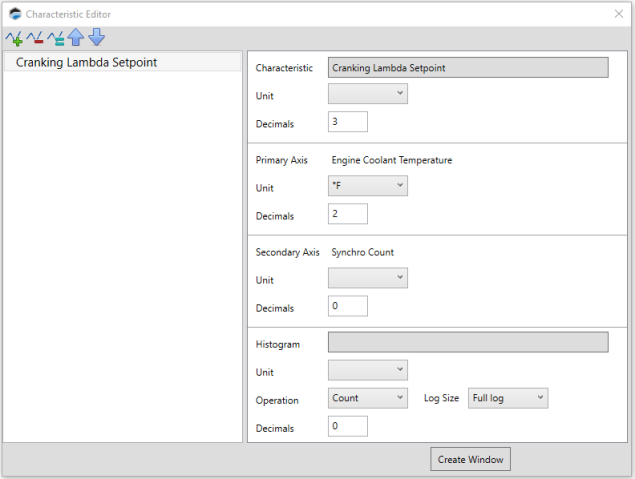
From top to bottom:
| ■ | The top group includes the table title and the format for the cell data. |
| ■ | The second group configures the horizontal axis. |
| ■ | For two dimensional tables only, the third group configures the vertical axis. |
| ■ | The last group can be used to add a histogram display to the new table. To do this, click the Histogram field and then select the measurement that will be used to to populate the histogram data. |
| 4. | Configure the parameters displayed. |
| 5. | If you wish to add a table to this subwindow, |
| a. | Repeat steps 2 through 4 for the new table. |
NOTE: When multiple tables are added to the same subwindow, they will be displayed as tabs across the top of the subwindow. A table can be selected by clicking its tab. If there are too many tabs to fit across the top of the subwindow, the first tab becomes a dropdown menu that you can use for table selection.
| 6. | When all the tables that you want to include in this subwindow have been added and configured, click Create Window. |
Toolbar
|
|
Add a new table to the list. To complete table setup, you must configure the table's parameters. |
|
|
Delete the table selected in the left column. |
|
|
Duplicate the table selected in the column on the left. |
|
|
Move the table selected in the left column upwards in the list. This changes the order of the tabs at the top of the subwindow. |
|
|
Move the table selected in the left column downwards in the list. This changes the order of the tabs at the top of the subwindow. |
