
Adding a Measurement List
A measurement list is simply a list of measurements, displayed as a two-column table, with the signal name in the left column and the current output value of the signal in the right column.
To add a measurement list,
| 1. | In the menu bar, select Layout > Add Control > Add Measurement > Add Measurement List. A window showing the properties for the new measurement list appears. |
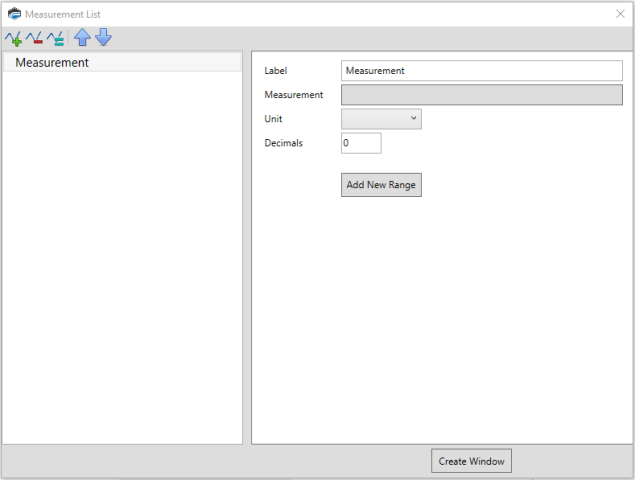
| 2. | Add measurements to the list (see below for instructions). |
| 3. | When configuration is complete, Click Create Window. |
Adding a Measurement to the List
| 1. | Click |
NOTE: Step 1 is not necessary for the first measurement added. One unconfigured measurement is already present in a new list.
| 2. | In the left column, select the new measurement. Parameters for the new measurement appear on the right. |
| 3. | In the right column, click the Measurement box. A list of available measurements appears. |
| 4. | Double-click on the measurement whose output you want to display. |
| 5. | Complete signal setup by configuring the signal's parameters. |
Editing an Existing Measurement
To configure a signal that is already included in this layout:
| 1. | Select the name of the signal in the column on the left. |
| 2. | Modify the signal parameters displayed on the right. |
Toolbar
|
|
Add a new measurement to the list. To complete signal setup, you must configure the signal's parameters. |
|
|
Delete the measurement selected in the left column. |
|
|
Duplicate the signal measurement selected in the column on the left. |
|
|
Move the signal selected in the left column upwards in the list. |
|
|
Move the signal selected in the left column downwards in the list. |
