
The layout editor is used to add, remove. and configure individual gauges. To open this window:
| 1. | Right click on the gauge display. |
| 2. | Select Gauges Layout. |
NOTE: Changes take effect immediately (without saving your changes to file).
Adding a Gauge
| 1. | Click |
| ■ | Add Round Analog Gauge |
| ■ | Add Vertical Bar Gauge |
| 2. | Click the Parameter link. The Parameter Selector window appears. |
| 3. | Double-click on the parameter whose value you wish to display in the gauge. A blank gauge should now appear on gauge display. |
NOTE: Your channels list must include a channel that provides the selected parameter. If you don't have a channel to do this, VCM Scanner won't query the vehicle or the external input for this data and may not know how to transform the raw data received into meaningful values. See Selecting a Parameter for more information.
| 4. | Complete gauge setup by configuring the gauge's parameters. |
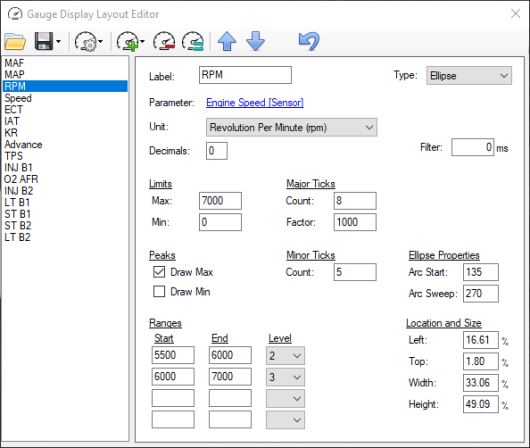
Editing an Existing Gauge
To modify a gauge that is already included in this layout:
| 1. | Select the name of the gauge in the column on the left. |
| 2. | Modify the gauge parameters displayed on the right. |
Toolbar
|
|
Open Individual Gauges or All Gauges |
|
|
To save the gauge selected in the left column, click this icon and then choose Selected Gauge. To save all gauges in the current layout, click this icon and the choose All Gauges. |
|
|
Default gauge layouts |
|
|
Add a new gauge. To complete gauge setup, you must configure the gauge's parameters. |
|
|
Delete the gauge selected in the column on the left. |
|
|
Duplicate the gauge selected in the column on the left. |
|
|
Move the gauge selected in the left column upwards in the list. When gauges overlap, gauges that appear higher in the list are displayed behind gauges that appear lower in the list. |
|
|
Move the gauge selected in the left column downwards in the list. When gauges overlap, gauges that appear lower in the list are displayed in front of gauges that appear higher in the list. |
|
|
Undo all changes to this gauge layout. |
