
Ethernet Configuration
When purchasing the CORE ECU an optional harness can be purchased to connect to the ECU, that harness will have a 2-meter Ethernet branch cable that allows routing of the Ethernet connector into the vehicles cabin. The Ethernet connector will allow a standard Ethernet cable to plug into the harness.
Using Ethernet to connect to CORE allows a plug-and-play feature to begin tuning immediately. If issues arise, the below step-based instructions outline common corrective Ethernet actions.
NOTE: If you are using a previously used Ethernet adapter, which has had an IP address setup previously and/or are having issues connecting in general, please follow the below steps:
| 1. | Connect your Ethernet adapter to your computer and ensure your Ethernet is connected to CORE. |
| 2. | In your search taskbar, search and select View network connections. |

| 3. | Right click on the Ethernet cable you just plugged in. |

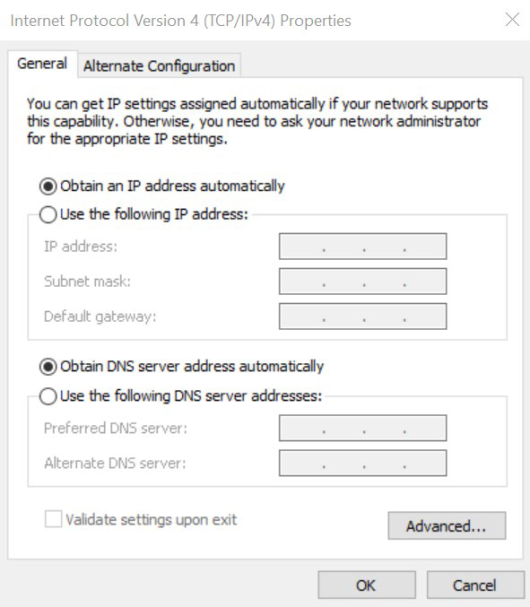
| 4. | Double click Internet Protocol Version 4 (TCP/IPV4). |
| 5. | Ensure the information matches the settings below. |
If issues are still present, follow the below steps to reset your network adapter.
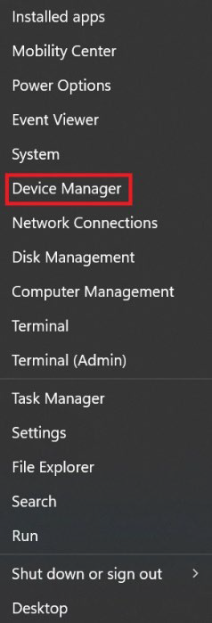
| 1. | Right click on the Windows Logo. |
![]()
| 2. | Select Device Manager. |
| 3. | Click on the drop-down arrow on the left-hand side of the “Network Adapter”, Then right click on the network adapter to reinstall. |
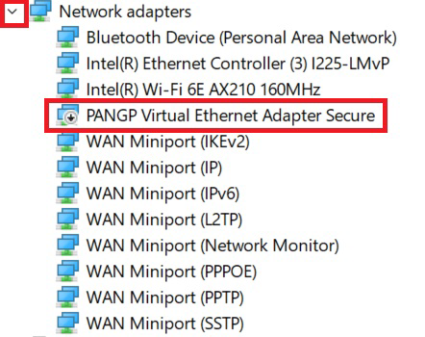
NOTE: The exact name of the network adapter will vary from computer to computer.
| 4. | Click Uninstall device. |
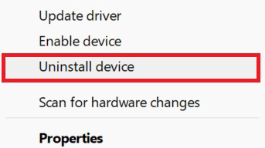
NOTE: If a checkbox appears to also delete the driver software, leave this box UNCHECKED.
| 5. | Select OK. |
| 6. | Restart your computer. The adapter will be reinstalled on startup and the adapter will be reset. |
