


This is meant to serve as a basic how-to for setting up a MAF fuel trim Graph (or graphs) in VCM Scanner V3. This will work on vehicles with one or two MAF tables.
-------------------------------------------------------
Adding MAF Fuel Trim Graph:
Step 1: Go to your "Graph" tab, right click and select "Graphs Layout". If you do not have a Graphs tab then go to Layout-->Add to layout-->Graph to add one to your layout
Step 2: In the Graph Layout Editor, select the icon with the green + mark on it and then click on "Add Table"
Step 3: In your newly created graph, click on "click to insert or change" next to "Parameter" at the top. This is where you define what you want to show IN the graph. In this case we are using fuel trim values. You can change this to your wideband or EQ (lambda) Error just as easily.
Step 4: A window will open called the "Parameter selector". You can browse through the list or type into the search bar to narrow things down. I know what I want is called LTFT+STFT so I typed in LTFT. Hitting the Gear icon w/green check mark will get rid of all parameters that you aren't logging and thus can't use. So, type in LTFT, hit the gear icon, then double click on LTFT + STFT
Step 5: This is what you should have at this point..
Step 6: Now we need to define what the graph column and/or rows will be based on. MAF tables only have a COLUMN axis, not a row axis. Click on "Parameter" in the "Column Axis" section. In the window that pops up, you can browse through or search for Mass air flow FREQUENCY. This HAS to be frequency since that is what we want the column to be based on. I searched for "Mass air", hit the gear w/green check mark, and found the parameter that has the unit of frequency. Double click on it once you find it.
Step 7: After you double click you will probably get a message about using a generic sensor instead of a specific one. I recommend saying yes to this. It will make your layouts much more universal, so that if you're later logging a vehicle where the MAF Frequency is a different parameter number, it will still work properly without having to make changes.
Step 8: Alright, check and make sure the parameter (circled in red) shows Mass airflow (FREQUNECY!!). Our next step is to tell it what the headers need to be (yellow). We want this to match up with our tune.. so....
Step 9: Open up your TUNE and open the MAF low table (or just MAF if you only have one). Right click, select Column Axis, and then select "Copy Labels"
Step 10: Go back to Scanner and paste those values into the "values" section for the Column Axis, as shown
Step 11: This is what you should end up with. The numbers may be different depending on your tune, but the point is you should have a Parameter called Mass air flow Frequency, a unit of "Hertz" and Values that match your tune, typically going from around 1000 to around 5800 in increments of 150
Step 12: Lastly, I usually go through and add some colors to make it more visual. I use a high value of 10, mid of 0 and low of -10. I change the high value to red and low value to a blue'ish color. I changed the cell hits requied to 5 as well. I would keep this value low in the beginning just to make sure everything is working first..
Now you're probably thinking.. but I've got TWO MAF tables, how am I supposed to tune two tables with one graph? Here is an easy way to make another graph for the high MAF table
Step 13: First, relabel the first graph to add "LOW" to the name just to keep the separated
Step 14: Scanner V3 includes a "Clone" feature where you can easily make a copy of a graph (or chart for that matter). It looks like an equal sign in the top tool bar. Click on it.
Step 15: Notice you now have two graphs.. relabel one of them to HIGH and leave the other one low.
Step 16: Now you need to change the values for the column axis to match the MAF HIGH table.
Step 17: Open your tune back up.. go to the HIGH MAF table, right click, column axis, copy labels.
Step 18: Back in Scanner.. delete the numbers in the "Values" box and then paste in your new ones that you just copied from your tune
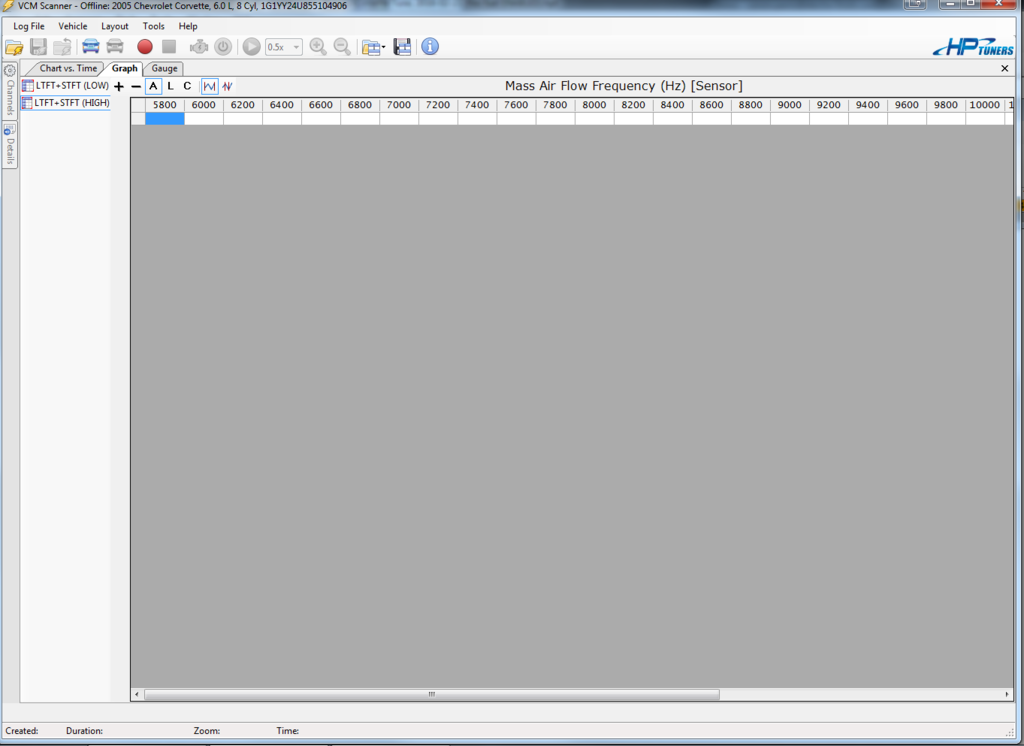
Step 19: And this is what you should have. Mine goes from 5800 to 12200
Step 20: You're done. You now have a graph for using fuel trims to make corrections to your MAF tables. Keep in mind that fuel trims are ONLY USEFUL when you are NOT in power enrichment mode. A wideband is required once in PE mode.


 Reply With Quote